How To Grip Tape a Skateboard
About skateboard grip tape
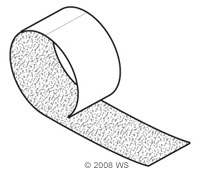
Skateboard grip tape is a grainy, sandpaper-like sheet with an extremely sticky underside that you adhere to the skateboard deck surface to provide grip, or traction. Regardless of what style you're skating, grip tape is a must if you want to stay on your board. There are no scales used to measure the quality of grip tape, as there is with bearings or wheels; most riders rely on brand preferences. Although buying and applying grip tape is fairly straightforward, it is one of the most important steps in getting your skateboard street ready.
Beyond providing traction, grip tape can have the added bonus of brightening your board and expressing your personal style. While grip tape is often black in color, it is also available in clear so you can show off a company logo. You can also find die-cut grip tape that displays the design and/or color of your skateboard deck underneath. Applying grip tape is usually a final step when you want to build a complete skateboard.
Grip tape is a one-time-use component, so you will need new grip tape whenever you get a new deck, or whenever you feel your grip start to slip. When to replace grip tape depends completely on your traction and texture preferences. Warehouse Skateboards has a full inventory of grip tape in many colors, patterns, and brands.
Skateboard grip tape size
Skateboard grip tape and longboard grip tape is made of the same material, though it is sold in different sizes to accommodate different sizes of skateboard deck. Grip tape is usually sold in 9" X 33" sheets for shortboards. Longboard grip tape can measure up to 12" X 4'. If you're gripping a longboard, cruiser, or old school skateboard, pay attention to the dimensions and make sure you have enough grip tape to cover your skate deck completely.
How to apply grip tape
Begin by peeling the bottom sheet off the grip tape, and carefully lay the grip tape sticky-side-down on the surface of your skateboard deck. Once applied to your skateboard, use a box cutter, razor blade, or sharp scissors to cut your grip tape to fit your skateboard deck or cruiser deck exactly. For optimal grip, adhere grip tape up to the edges of your skateboard deck.
To actually see grip tape applied, check out this helpful video:
How to Apply Grip Tape to Your Skateboard Deck - WarehouseSkateboards.com from Warehouse Skateboards on Vimeo.
Top Selling Grip Tape
Still have questions?
We are Warehouse Skateboards. Our goal is to provide you with great customer service and information to make an informed skate purchase.
Give our customer service team a call at 877-791-9795. They will help you find the right products to fit your skateboarding needs. Still have questions? Please fill out our simple contact form.